Info
There are two substance projects, one with Shading and Normals for Pawpads/Beans & another without. They are otherwise identical and produce the same textures.
Color & Material Presets
These are placed at the very bottom Layer of each Texture Set to help keep colors consistent throughout your layers.
If you want to quickly and easily re-color the avatar, you can utilize these by replacing or modifying the materials in those folders, these changes will be propagated throughout the avatar.
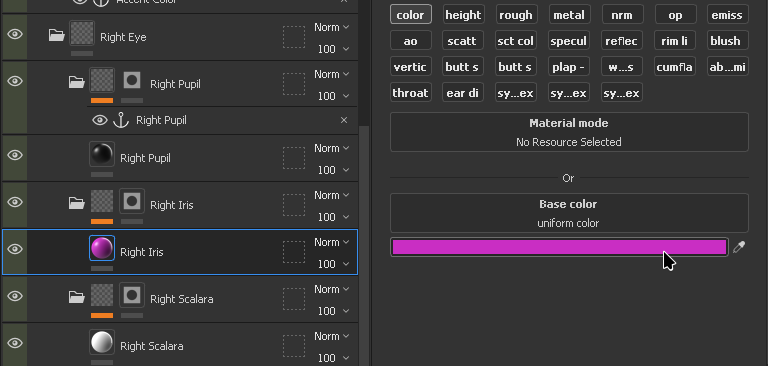
The materials use anchors on the folder itself, so you can duplicate, add more than one or modify the materials in that folder, and they will all apply to that area.
The anchors are not specific to just colors, they work for patterns too! For example, in the image above, if you were to add a material that has stripes to the Right Scalara folder, you would see those stripes on the eyes.
You don't have to use these either!
Some people have mentioned to me they don’t like this workflow, and that’s totally fine! Feel free to ignore this folder and place materials wherever you like in the project!
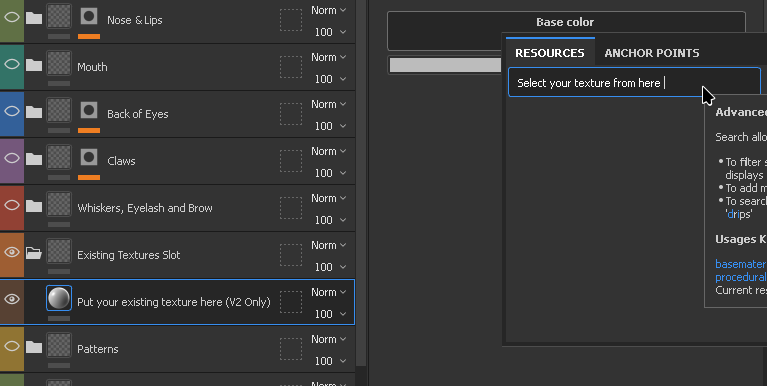
Existing Textures
Existing V2 textures are compatible with V2.1 and can be imported into the slot labeled Existing Texture Slot
Start by clicking File > Import Resources and selecting your existing textures.
Existing Shading
If your exiting texture has shading baked onto the base texture, you may want to re-export your pre-existing texture from your old project prior to importing it here.
You can alternatively decide not to use the new shading and disable the layer
AO & Shading
After importing your existing textures, Enable the Existing Textures Slot Folder in your layers, then select the material in the existing textures slot and replace the base color with your exiting texture.
You can search for it by the file name, or drag and drop it from the Asset library window.
Enabling and Disabling Options
Feel free to enable and disable any Layers, Such as the Eyeliner, Redness/Flush & Tufts to match your Characters design.
Just be sure to also disable the same layers on the NSFW Texture Set too or you may have visible seams between the textures in unity!
Matching Textures
You will need to make sure your textures & patterns match between the Body and NSFW Texture Sets to make the transition seamless in VRChat.
I’d recommend starting on the body Texture Set, and then copying your final materials over to the NSFW texture set to ensure consistency.
Make sure Custom Maps is enabled
Warning
Please make sure that the
Custom Maps (Enable Before Export)folder is enabled on both theBody&NSFWTexture Sets before exporting your textures. This folder contains important masks and Texures for the operation of the NSFW addon!
Exporting
Once your all done with Texturing, you can move on to exporting your textures in Export Configuration